The Edge Joint (AKA Butt Joint)
The Edge Joint, also known as a Butt Joint, is a fundamental woodworking technique used to join two pieces of wood by aligning their edges and attaching them together. This type of joint is commonly used in construction and furniture making and can be secured with glue or fasteners.
Where an Edge Joint is Used
This type of joint is commonly used in a variety of woodworking projects, including furniture construction, cabinetry and paneling, flooring, and wide board creation. The edge joint technique is a tried and trusted woodworking joint that has been used in various forms of woodworking, carpentry, and construction for centuries.
In furniture construction, edge joints are commonly used to join the edges of table tops, desks, and other pieces of furniture. This allows the woodworker to create larger surfaces or to join smaller pieces of wood to create a larger piece.
In cabinetry and paneling, edge joints are used to join the edges of wood panels to create a seamless look. This is particularly useful for creating large flat surfaces such as cabinet doors or wainscoting.
In flooring, edge joints are used to join the edges of planks to create a continuous surface, this can be done with both solid wood and engineered flooring.
Wide boards can be created by joining the edges of narrower boards together using edge joints, this can be useful for creating wide planks for table tops, countertops, or other surfaces that require a wider board than what is available in standard widths.
Materials and Tools Required
It’s always a great idea to work on a good quality, stable workbench when carrying out your woodworking projects, lets take a look at what else you’ll need:
- Two pieces of wood of the same thickness, with straight and parallel edges
- Wood glue or fasteners such as nails or screws
The following tools are needed to create an edge joint:
- Saw: To cut the wood to the appropriate size and shape.
- Square: Used to ensure that the edges of the wood are straight and at a 90-degree angle.
- Clamps: These tools are used to hold the two pieces of wood together while the glue dries or the fasteners are being applied.
- Drill or Screwdriver: Used if the joint is being secured with screws or nails.
- Chisels: These tools are used to make sure that the joint is tight and secure, and it’s very important that they are sharp enough to make clean cuts.
- Mallet and Hammer: Used to tap the chisels if more cutting force is required.
Step-By-Step Guide
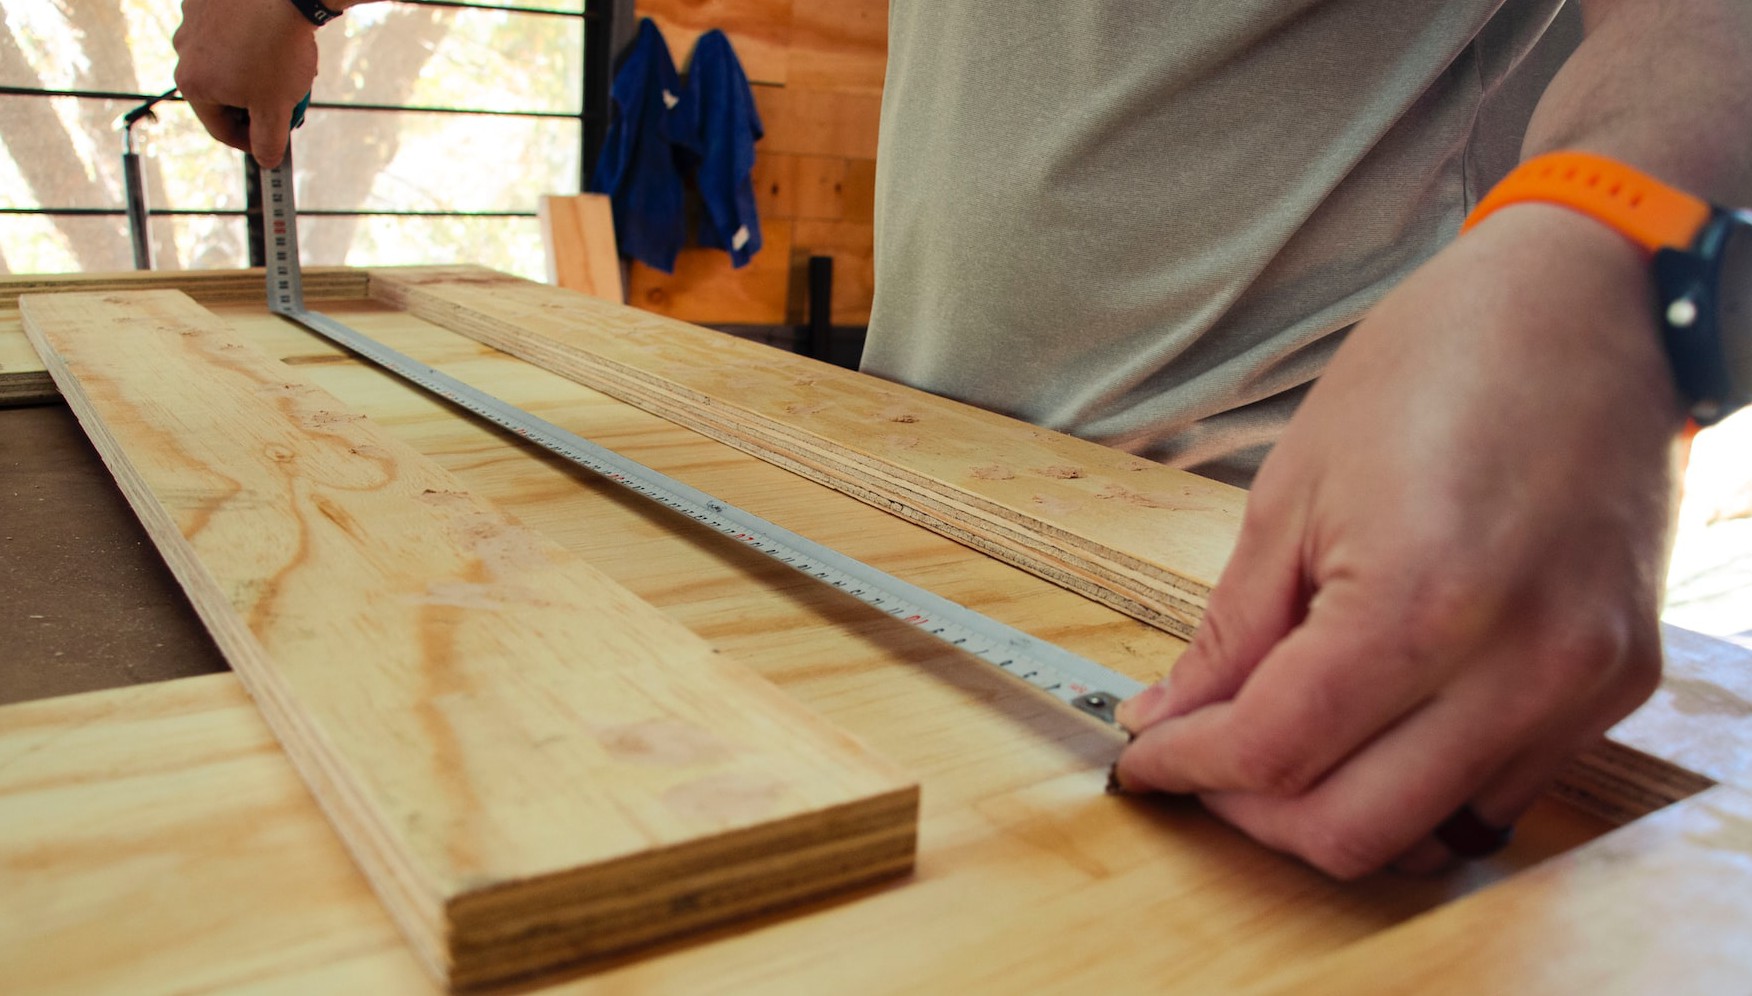
Measure and Mark
Step 1: Use a straight edge or T-square to measure and mark the desired length of the joint. Make sure that the edges of the two pieces of wood are lined up correctly and that the widths are the same. Measuring and marking the wood correctly is crucial for the success of your joint. It’s important to double-check your measurements and marks before cutting the wood to ensure that you have the correct length and that the pieces will fit together correctly.
Cut the Wood
Step 2: Using a saw, carefully cut the two pieces of wood to the desired length. Make sure that the cuts are straight and precise, as this will ensure a tight and secure joint. The most common saws used for this step are a circular saw or a table saw, but a hand saw can also be used. It’s important to use a saw with a sharp blade, and to make sure the saw is properly set up and secured before cutting.
Prepare the Wood
Step 3: Use a jointer or hand plane to ensure that the edges of the two pieces of wood are parallel and smooth. This step is important to ensure a tight and secure joint. If necessary, use a thickness planer to make sure that the two pieces of wood are the same thickness. It’s important to take your time and make sure that the edges are as smooth as possible before moving on to the next step.
Apply Wood Glue or Fasteners
Step 4: Apply glue to one edge of one piece of wood, or place fasteners such as nails or screws in the appropriate locations on one edge of one piece of wood. When using glue, make sure to apply it evenly and to all edges, for fasteners make sure that they are placed at the right distance and angle.
Assemble the Joint
Step 5: Align the two pieces of wood so that their edges are flush against each other, and then clamp them together. If using fasteners, use a drill or screwdriver to drive the screws or nails through the two pieces of wood, making sure that they are driven in straight and at an appropriate depth. Make sure that the two pieces are tightly secured together by using enough clamps.
Drill and Screw
Step 6: This step is optional, but it is highly recommended when using screws to join the edge joint. Drilling pilot holes will prevent the wood from splitting when the screws are inserted, this also helps to make sure that the screws will be inserted at a perfect 90-degree angle to the edge of the wood. To do this step, first, use a drill bit that is slightly smaller than the diameter of the screw, make sure to drill the hole at the same place where the screw will be inserted, then insert the screw and fasten it. If you are unsure of the correct size of the drill bit to use, consult the manufacturer’s specifications of the screws you are using.
It’s important to note that if you are using hardwood, pre-drilling is essential, as it will prevent the wood from splitting when you insert the screws. Additionally, it’s worth using a countersink bit to drill a recess for the head of the screw, this will help the head of the screw to sit flush with the surface of the wood, which will give a more professional look to your project.
Check and Adjust
Step 7: Use a square to ensure that the edges of the joint are at a 90-degree angle, and use a chisel and hammer to adjust the joint as necessary. This step is important to make sure the joint is at a perfect 90-degree angle and to make sure that the joint is tight and secure.
Sand and Finish
Step 8: Once the glue has dried, remove the clamps and sand the joint to remove any rough edges. Finish the project to your desired look. I love to use a combination of a sealer and a topcoat of oil-based varnish for a smooth and durable finish.
By following these steps, you have created a strong and stable edge joint. Remember to take your time, always measure twice, and make any adjustments to ensure a tight fit. And always use safety gear when working with power tools.
And as I always say, ‘have fun!’ woodworking is all about creating something beautiful and useful with your own hands, so enjoy the process.